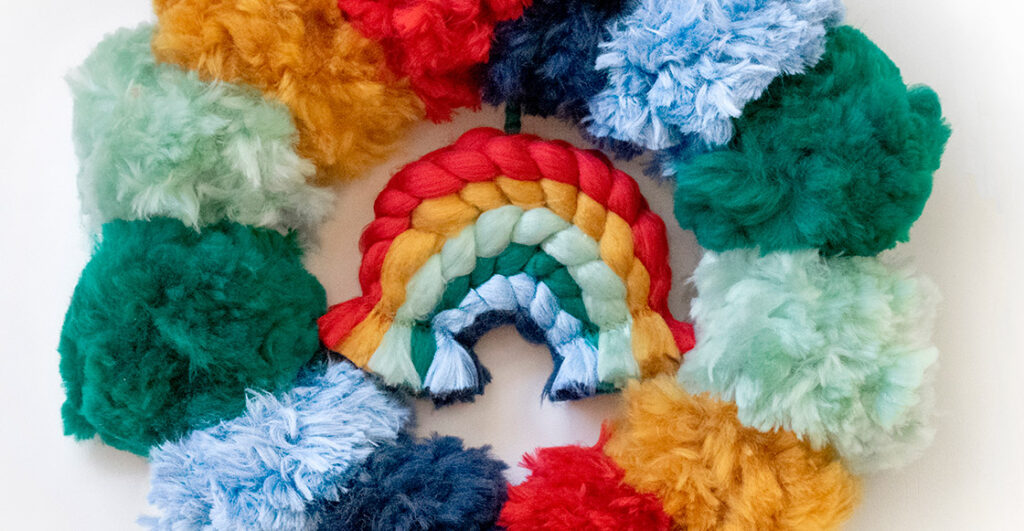
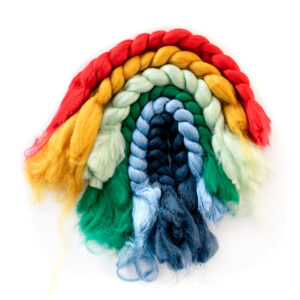
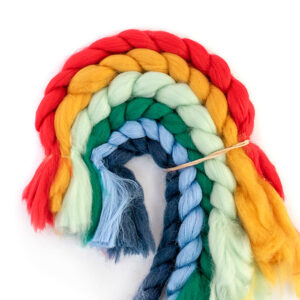
Needle Felted Plaited Rainbow decoration, made with left over yarn from the Pom Pom Circle Wreath Making Kit, pictured in “Rainbow” colours.
Yarn stash, scraps, odds and ends, bits and bobs; whatever you call them, extra lengths of yarn are always handy to keep. A lot of your DIY kits where you can make your own chunky crafts, come with a little extra from us.
We want to make sure that you definitely have enough yarn to complete your creation so we over estimate a little. So you may then find that after you’ve tried a few of our kits, you have built up some extra Mammoth® Yarn and may be wondering what could be done with it!
We have just brought out new colour combinations available in our Pom Pom Circle Wreath Making Kit and thought this a perfect time to have a go at needle felting some cute extra decorations that you could also try yourself.
These ideas are certainly not set in stone, you can adapt them however you want, depending on what spares you have accumulated. Get creative, be unique and enjoy! Oh and don’t forget to share your makes with us on Instagram @woollymahoosive
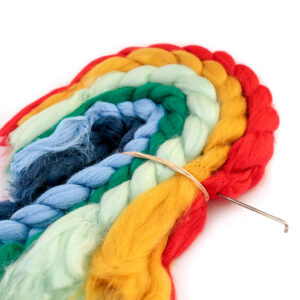
Plaited Needle Felted Mammoth Rainbow
 Don’t forget, you don’t have to stick to the colours you see here. We have created this super cute needle felted plait rainbow with the spare yarn from the “Rainbow” colour combo of the Pom Pom Wreath Making Kit, but you may find you have other colours to experiment with. A rainbow doesn’t HAVE to be rainbow coloured!
You can use any kind of needle felting equipment you can get your hands on, however, if you are a regular customer, you may have received one of our needle felting freebies in the past? Such as our mini valentines hearts, spring flowers, Halloween ghosts or Christmas snow people? If so, you could reuse your equipment from these, but, again not to worry, needle felting equipment is readily available from all good craft shops and are really handy tools to have in your crafting depository.
THE BASICS
If you have read our previous tutorial for needle felting hearts, you’ll probably be well versed with these top tips, however, here they are again:
The process becomes intuitive the more you practice, but here’s our top tips to get you started with for needle felting using our Mammoth® yarn:
-
Be careful! Obviously, these needles are very sharp and we want to avoid injuries! So keep those digits out of the way of the needle, sounds obvious, but we need to mention it. Plus, this is not a suitable activity for children.
-
Protect your table. A couple of layers of foam blocks will do the trick, we don’t want your beloved crafting table to look like it has had woodworm!
-
Stab it with the pointy end… It really is that simple. If you have more than one thickness of needle, start with the biggest and when this doesn’t push easily through, swap it for a thinner one. The thinner needle will help with smaller detail and tidying up the surface of your work.
-
Turn your work regularly. If you zone out and stab for too long (perhaps thinking about an ex-partner?) you risk the work getting stuck to the foam blocks. So carefully peel it off and flip it over regularly, working on both sides.
-
Don’t forget the edges. Make sure you are stabbing all over, both sides and spending plenty of time around the edges, corners and points of the shape you are creating, folding in any frays.
-
Trimming is fine, just don’t get too snip happy! Using sharp scissors, you can neaten up the edges as your final step, but be careful not to over do it or you’ll end up with fraying or not a lot left!
HOW TO MAKE THE RAINBOW
Following the steps below, you can create your own needle felted Mammoth® rainbow to decorate whatever you wish!
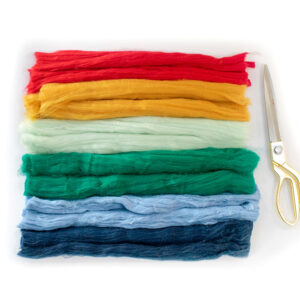
Step 1. Collect your spare yarn and arrange in the colour combo you wish.
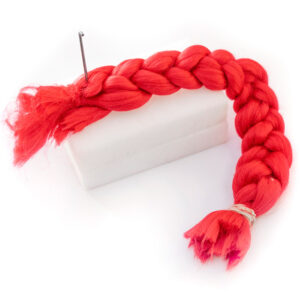
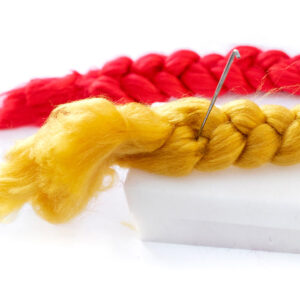
Step 2. Divide each strand into 3 and plait, you could use an elastic band to secure one end. Work the other end with your felting needle, remembering to use your sponges to protect your table
Step 3: Repeat with all your coloured strands.
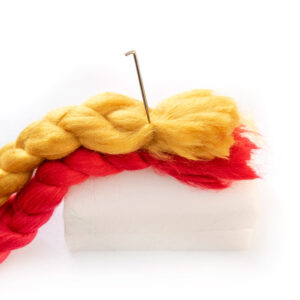
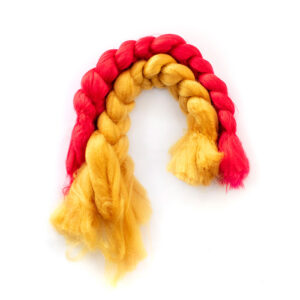
Step 4. Starting at one end, place each colour in turn on top of each other, using the felting needle to secure into place.
Step 5. Keep repeating step 4 until all your colours are joined.
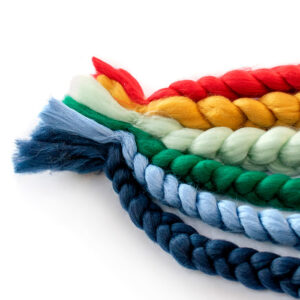
Step 6. Shape all the layers into the rainbow shape and secure with an elastic band at the other end.
Step 7. Put your work on the foam blocks and needle felt to secure this side; working into the top, reverse side and at either end through each layer.
Step 8. Felt gently though the top layers to secure the rainbow shape further.
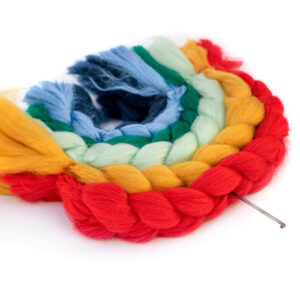

Step 9. Felt underneath through the bottom layers to secure. Shape and trim the edges for a neat look or leave raw edges. Your choice!
THE POM POM WREATH KIT
Just a reminder, these needle felting extras have been creating using the offcuts from our Pom Pom Circle Wreath Making Kit , and look fab as added extras to your wreath.
Whether for a child’s bedroom wall hanging, a baby’s nursery wall art, an Easter or spring wreath, there is a colour combination to suit. We also think these kits are perfect for crafting parties; whether a crafting workshop, parties with friends or for older children’s sleepover activities; they are available in packs of 4, 6 and 8! Click the link below to have a browse!
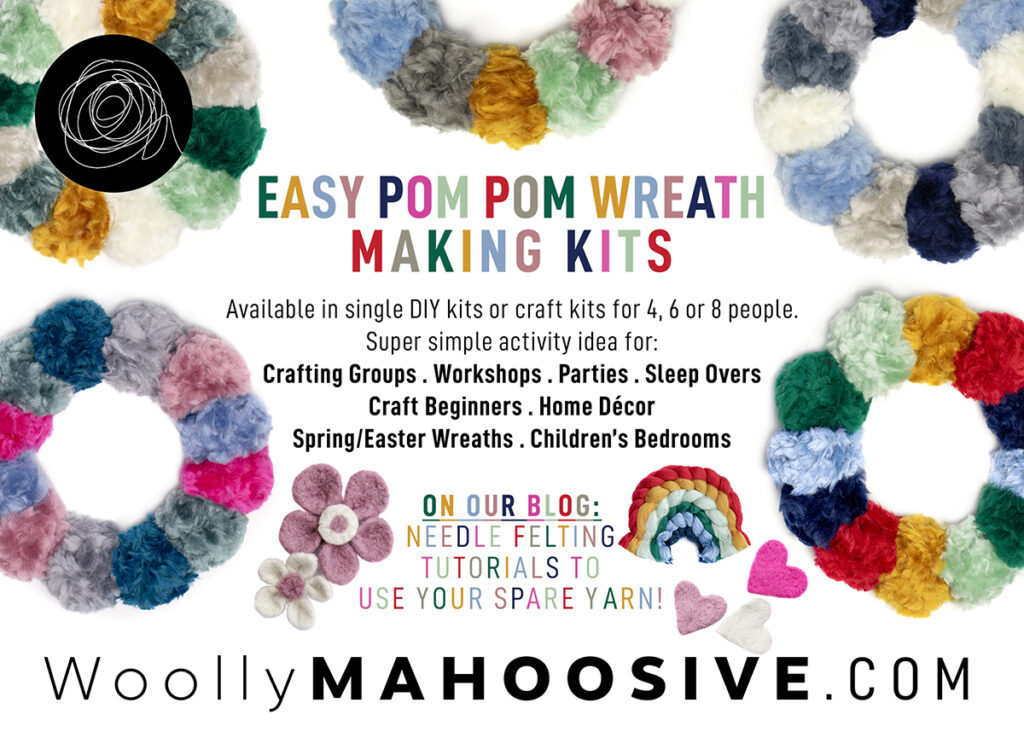
Click on the image to see our Pom Pom Wreath Making Kits!

0 Comments